
With my paper selected and cut, all that remains is folding the final piece.
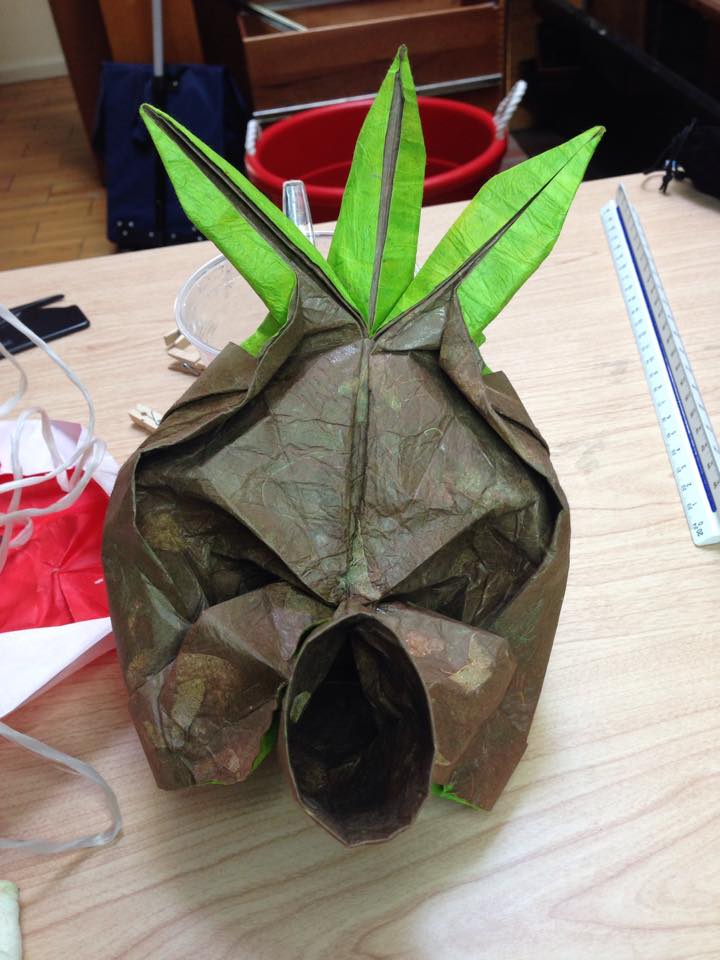
As I expected, the paper was VERY thick, thanks to that green Lamali Lokta paper. But while some steps were much more difficult than they had been on the thin test paper, that added thickness translated into more body in the paper, giving the multiple-layered areas a very satisfying wood-like quality.

The most frustrating part ended up being the bridge of the nose between the eyes. If you look at the test runs on the practice paper, you can see that the point between the eyes is attached to the base of the ‘snout’ (snorkel?), which creates the eye sockets and gives the mask some depth. Those sections are not actually connected, they are only held there with shaping.

With the final, I wasn’t allowed to use tape. The whole art of origami is starting with one square of paper and ending with the same square of paper, creased but uncut.
When I was younger I took this policy VERY strictly. There was a short period as a child where I even refused to use a blade to cut the starting square from a rectangle, like most printer paper. In my mind once I knew how to isolate a square and how to tear a crease without TOO much fuzziness along the torn edge it was my duty to stick to the purity of one artist and one sheet of paper – no more, no less.
Today, I love being ABLE to do that when the time calls for it and I want to show a young folder-to-be something cool with whatever scrap of paper I can find. But I’ve learned that sometimes going by the spirit of the law instead of the word of the law grants much more potential. After all – I’m already using two different sheets to get the two colors I want. If scissors were once forbidden then professional paper cutter I use now would certainly be out. Heck, the entire basis of the previous post was coating the whole sheet in three layers of glue. And once the finished sheet is dried and folded that water-soluble glue will soften and then reharden in whatever shape it dries in. If you have ever spilled a drink on a book, you may have noticed how the pages will lock into that wrinkled shape forever. As I mentioned in the last post, paper can be (oversimplified, but effectively) viewed as pulp and glue pressed flat and left to dry. Adding more of that same glue lets origami artists harness that quality of paper to harden where set and have even more control over the final shape.
So one further concession commonly made by myself and many other modern origami artists is to allow for SOME additional glue to be used in the final result as well. Most often it is the same type of glue used to treat the paper before cutting it, but some artists use a faster-drying glue to expedite the process.
Which brings us back to the bridge of the nose.
Most of the time when I’m doing the final shaping, I’ll moisten with water where appropriate, add glue where necessary, and use clothespins to hold it in place until it all dries. But sometimes the pieces are closer to the middle of the piece, where pins won’t reach. For those situations, I went out and bought some strong magnets which I place on one side and some paper clips or nails to the other, letting the magnetic bond hold the two areas together.
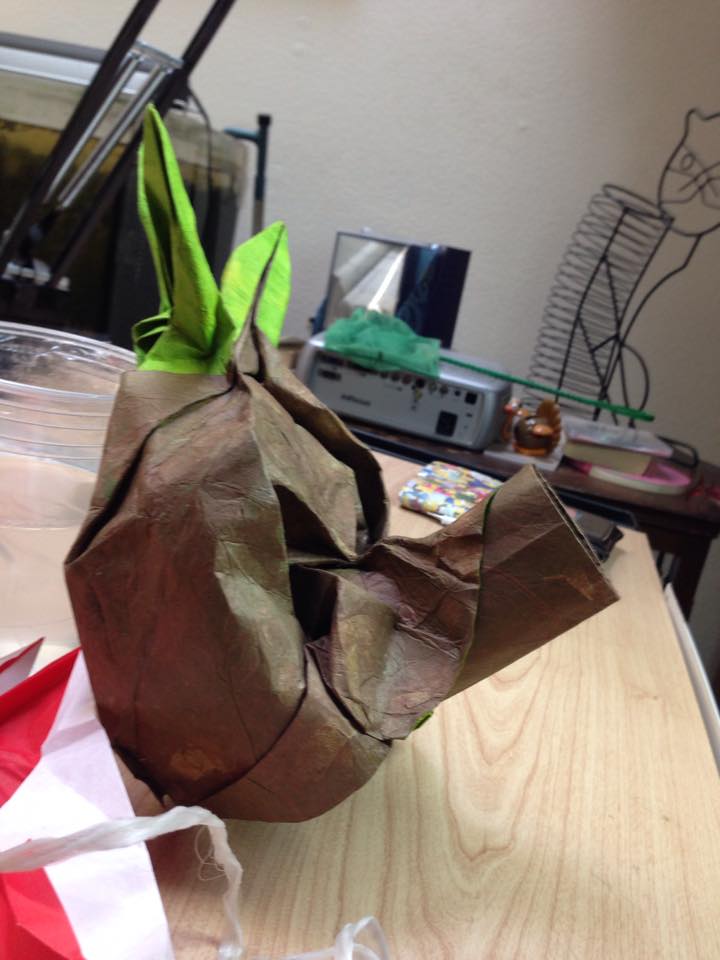
But for the bridge of the nose here, neither solution was working for me. It was too close to the center for the clips, but the surface wasn’t flat enough on both sides to pin between the magnet and the metal. I spent hours trying, so much that I nearly ruined it all with the amount of glue I was applying and having dry part way only to end up not holding where I wanted it.
Finally, I got it to hold through a combinations of clips and string, which I strung around the middle leaf and the snorkel snout.
So without further adieu, I present our result!

The only way I could imagine it POSSIBLY being any better would be if it were set next to Goron and Zora companions…
Soon…
